The Ultimate Guide To Creating A Multi-Purpose, Multi-Functional Room
In the past two years, most of us have spent more time at home than we ever have. If you ask us, it’s a combination of various things…
- The pandemic
- The fact that jobs now offer more flexibility and work-from-home options
- How we can order anything and everything online, and have it delivered to our doorstep
The inertia is real. We’re used to staying home!
Now that we’re home so often, our relationships with our homes have changed radically. In the past, you’d go to work, then come home and unwind at the end of the day.
But these days, we do everything at home. Our homes are our offices, our schools, our restaurants, our movie theatres, and even our gyms. Most of us who are looking to get more utility and function out of our homes – and that’s where multi-purpose rooms come in.
What Is A Multi-Purpose Room?
First things first… what’s a multi-purpose room?
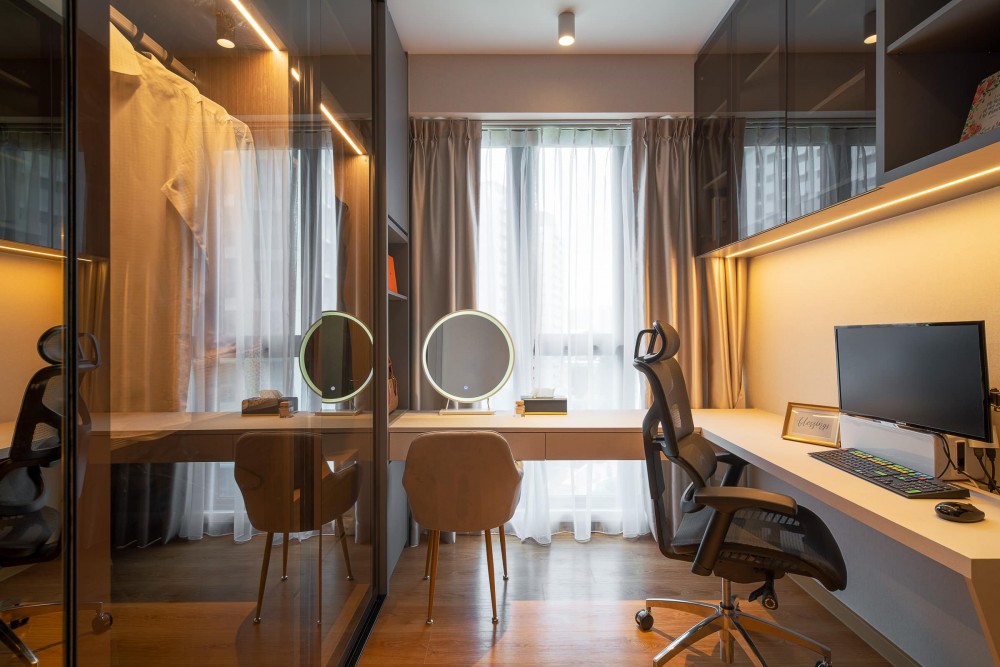
Rivercove II ($65,000) by Mr Shopper Studio
This is simply any room that has more than one purpose or function. Here are some examples:
- Guest room + workspace
- Laundry room + workspace
- Laundry room + crafts room
- Multipurpose entertainment room – for doing yoga, playing video games, painting
If you want your multi-purpose room to serve your needs well, you’ll need to do some proper planning. This starts off with…
Step 1: Identify Who Will Be Using It, And For What
The very first thing to do when designing a multi-purpose room is to figure out who’s going to use the space, and what they’ll use the space for.
Once you’ve identified these, you can then figure out how to zone your room, what items of furniture are essential, and more.
When designing your room and thinking of how the space will be used, keep in mind that certain combinations might not make sense. For example:
- Reading room/Library + crafts room: Assuming that you want your reading room to be peaceful and quiet, you might not be able to combine it with a crafts room, which will come with a certain amount of noise and chaos.
- Office/playroom: It’ll be hard to focus if your office doubles up as your kids’ playroom – plus you don’t want your kids to accidentally get their hands on or destroy your important documents and gadgets.
Make sure there are no potential clashes when you’re thinking through the different uses of the room, before you move on to the next step!
Step 2: Define Your Zones
Now that you’re clear on what your multi-purpose room is going to be used for, the next thing you’ll want to do is to define your zones, and demarcate your space.
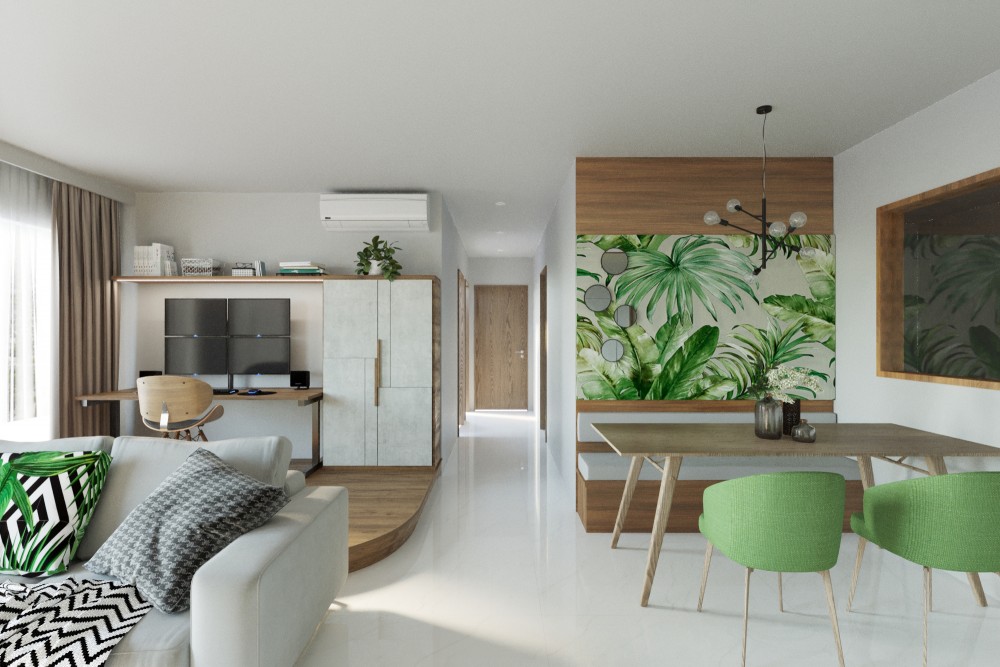
678C Punggol Drive ($10,000) by Kontrast Design
The idea is to create a zone for each of the functions. This way, you have everything you need within that one zone – your materials/supplies/utensils aren’t spread out within the room.
Here are some tips on how to do this:
- Think about how much time you’ll spend in each zone, and allocate space accordingly. Say you’re building out a laundry room + workspace, and you foresee that you’ll only use the room to work 30% of the time. In this case, it doesn’t make sense allocating 50% of the space to a work zone. You’ll get more utility out of the laundry zone, so go ahead and allocate more space to that.
- Start with the largest zone first, and fit smaller zones around it. This makes it easier for you to plan, and decide where everything goes.
- Consider how people will move through the space, and make sure there’s plenty of room for traffic to flow.
- Explore different ways to divide up your space visually. Obviously, you can do this by switching up your wall colour or having different floor tiles in different zones. But that aside, there are also quick and easy ways of demarcating different zones, such as using room dividers and rugs. You can even use furniture to do this – for example, if you place a bookcase and a large couch back to back and facing away from each other, this can help segregate your space into a entertainment/play area vs a reading area.
Step 3: Identify What Items Of Furniture You Need In The Room
After you’ve defined the zones of your room, the next step is to pick out furniture.
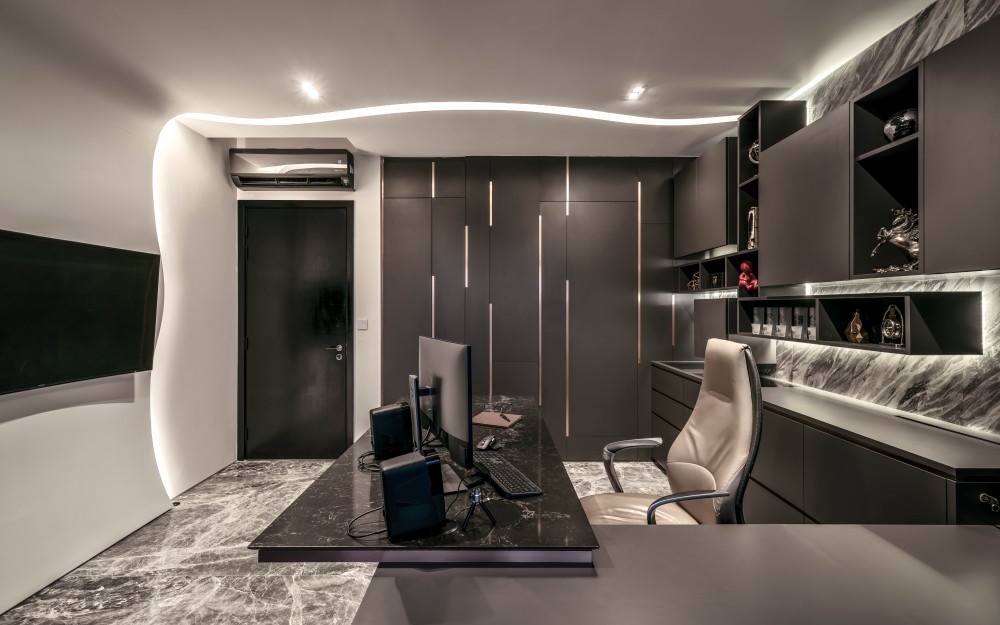
Tapestry ($72,000) by Mr Shopper Studio
This is fairly straightforward – depending on the usage of the room, think of what essential pieces of furniture you’ll need. For example, if you’re building out an office + guest room, you’ll need a desk, office chair and a bed at the very least.
The point of doing this is to figure out what’s your bare minimum, and from there, calculate how much space each item will take, so that you can plan a layout that allows for maximum functionality.
Can you introduce additional pieces of furniture, on top of the bare minimum? Of course you can – but it’s always easier to start with less, then add more. You don’t want to buy a ton of furniture and home decor at the start, then realise that you’ve overcrowded the room.
What type of furniture should you use in multi-purpose rooms?
When purchasing furniture for multi-purpose rooms, think about pieces that help you maximise storage, so that you can make the most out of your space. For example:
- Fold-away desks
- Extendable tables
- Wall beds that can disappear into your wall
- Sofa beds that can double up as a guest bed
- Corner shelves or storage units (these carve more space out of under-utilised spots)
- Ottoman cubes that can act as seating or footrests, but also have storage built-in
One last tip – for anyone who needs more space, your walls are your best friend!
Walls aren’t just for hanging art – you can mount a bicycle on your walls, hang a fold-down table, and even install a hanging pot rack where you can house all your pots and pans. By making use of your walls, you’ll be able to free up your floors, giving your room more breathing space.
Step 4: Plan For Lighting
When redecorating a space, lighting is often an afterthought. But with multi-purpose rooms, it’s important to plan out your light fixtures, to ensure that you have proper lighting for your activities.
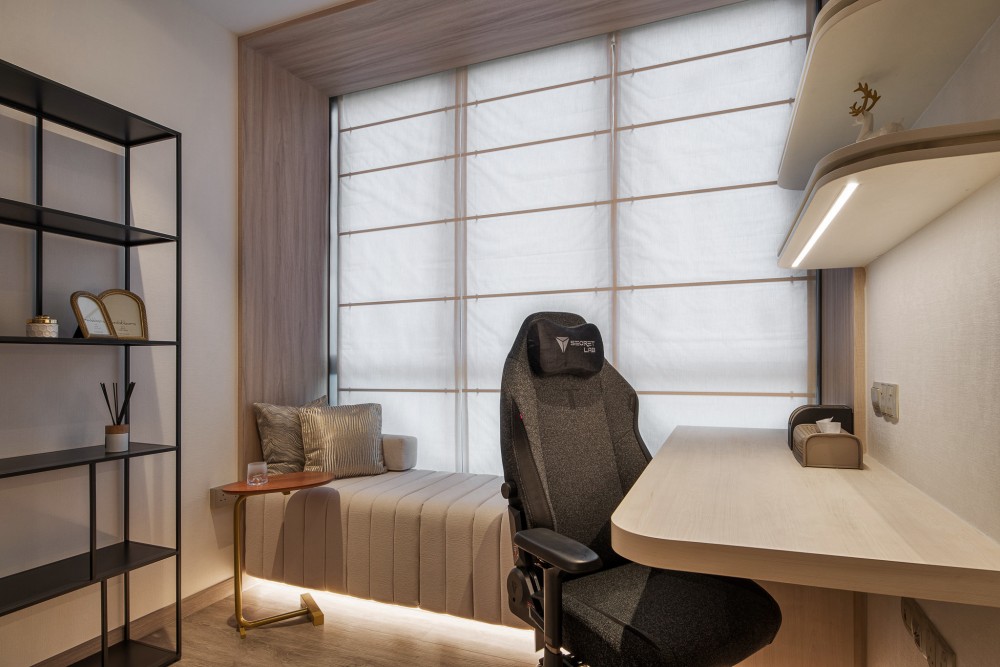
Ocean Drive, Singapore ($200,000) by Weiken.com Design Pte Ltd
Generally speaking, multi-purpose rooms should have all three types of lighting in place:
- Accent lighting: lights that direct attention to a certain area, for example: track lights that are directed towards your artwork or display cabinets
- Task lighting: lights that enhance visibility for specific tasks to be carried out, for example: floor lights to provide light for reading, under-cabinet lights to provide light for kitchen prep work
- Ambient lighting: lights that are used to illuminate the whole room, for example: recessed lights, pendant lights
When planning your lights, start with ambient lighting, then add task lighting and accent lighting based on what your multi-purpose room will be used for.
Step 5: Fill In The Gaps
Now that you have your essential furniture and lighting in place, all that’s left to do is fill in the gaps!
Bring in other furniture and decor pieces to make the room more cozy, give your room a test-drive, and then adjust based on your preferences.
That’s all there is to it – you’ve now successfully designed and created your very own multi-purpose room!
Want to check out home renovation projects for more inspiration? Browse interior design projects on Hometrust, or click the button below to get connected with expert designers.
Renovating soon? Speak to top rated interior designers.
Discuss your home renovation ideas and plans with top rated firms, recommended by past homeowners. Let us help you shortlist the most suitable interior designers for your project.